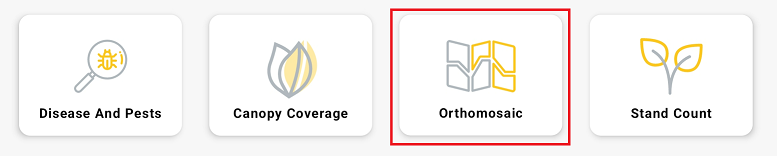
Select the "Orthomosaic" Mission.
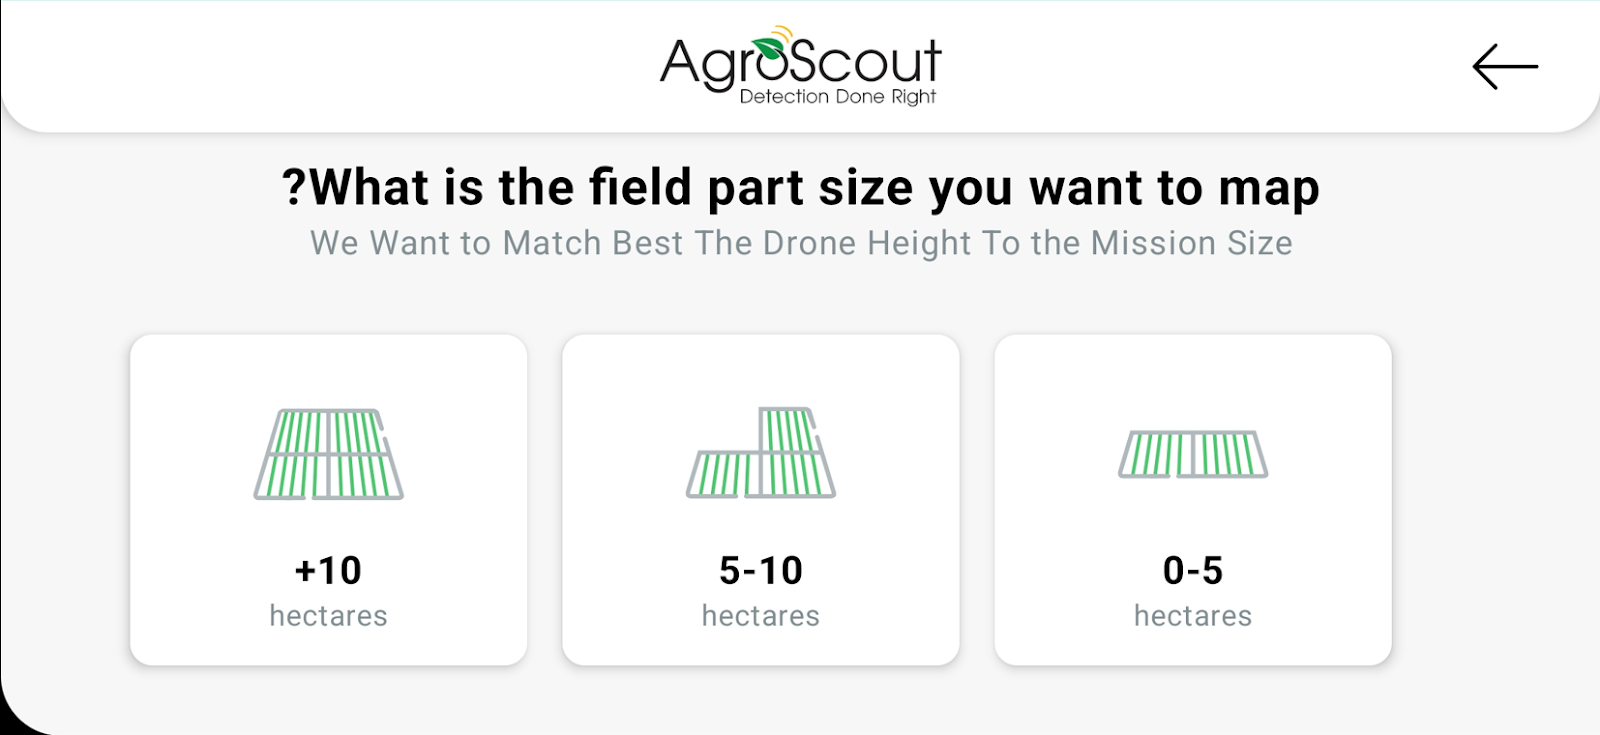
Select the size of the field you want to analyze.
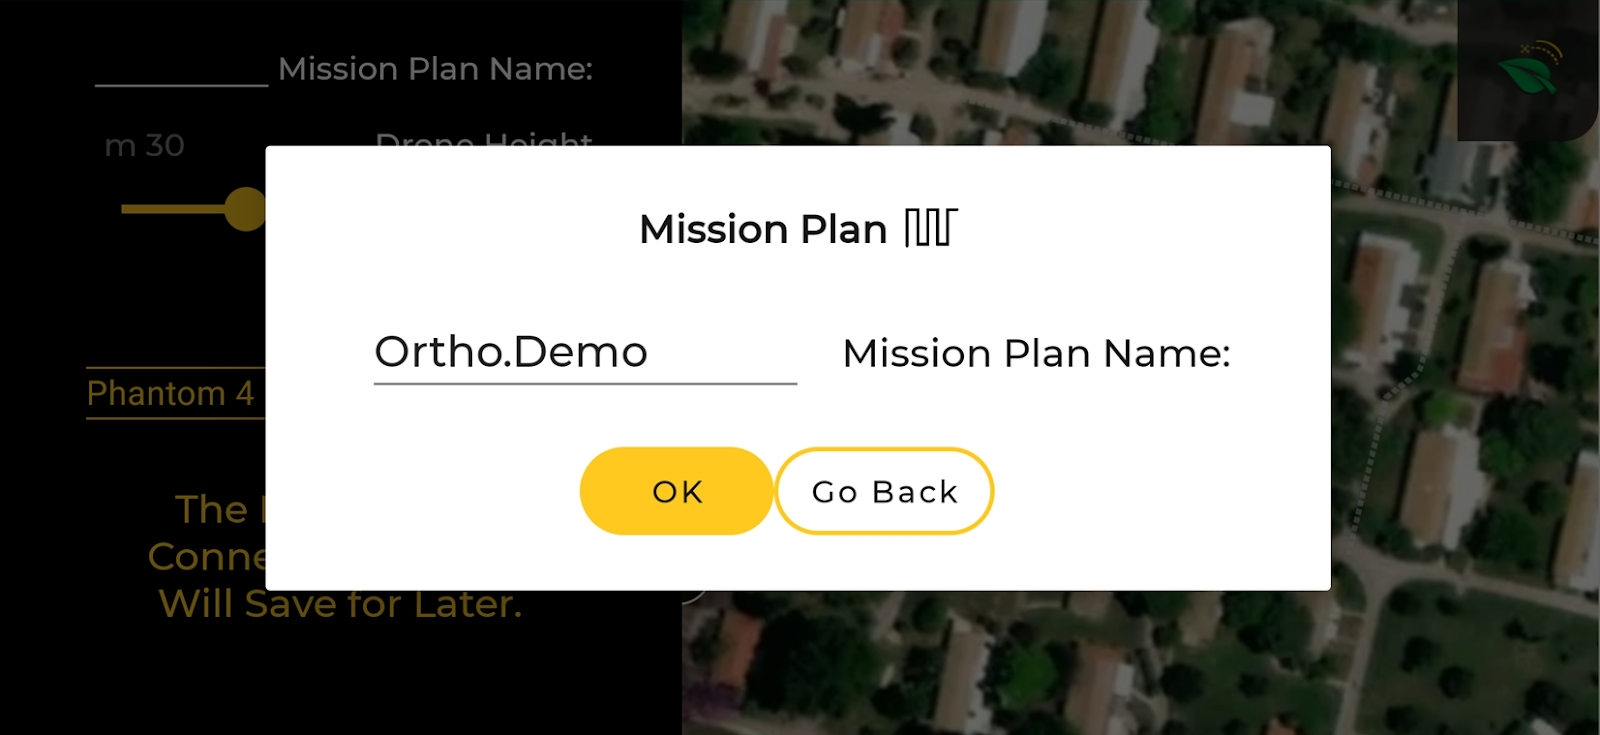
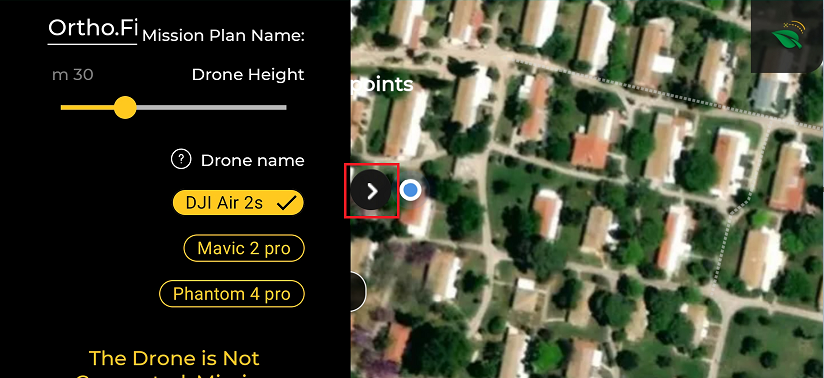
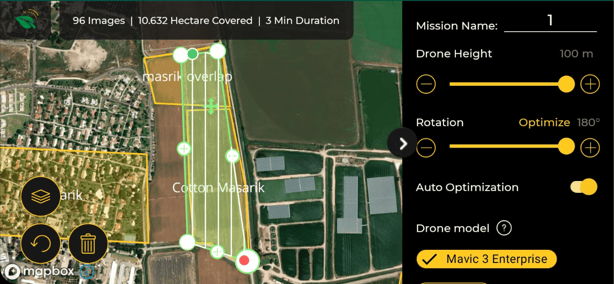
Enter the "Mission Plan" name.
Tip: Name it with the field name and pattern used when creating a new mission. Example: "Potato221.Ortho".
Finding this quest in the "Existing Mission Plan" option will be much easier when you want to repeat it.
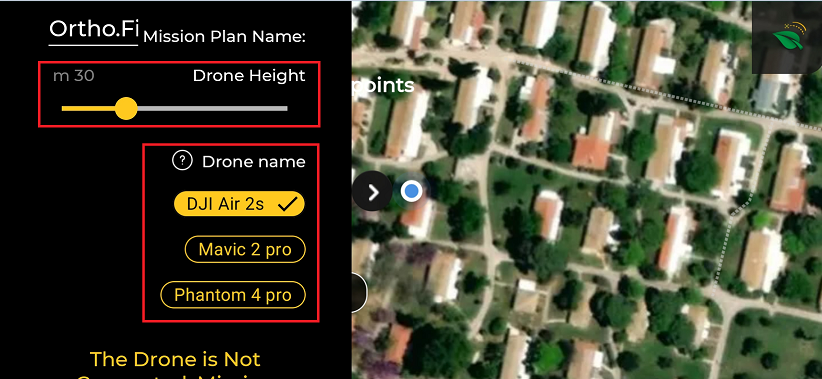
Adjust the "Drone Height."
Higher altitudes mean fewer images/time to cover the entire field but lower image resolution and vice versa.
In office: Select the "Drone Name" according to your drone type.
In Field: The application will automatically make the drone type adjustments.
Caution: Fly only at authorized altitudes and avoid power lines.
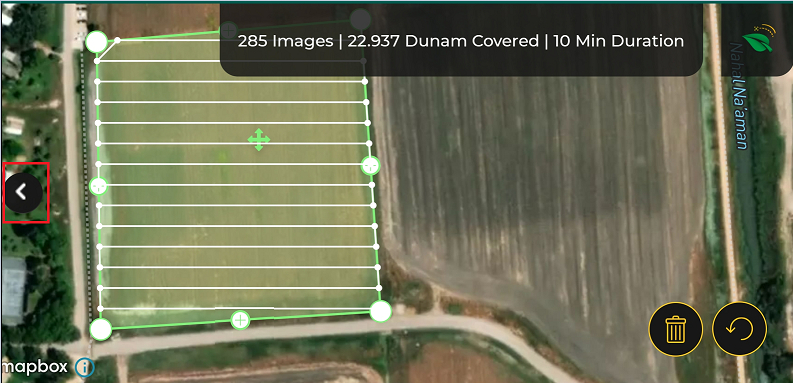
Press the black arrow to minimize the settings bar.
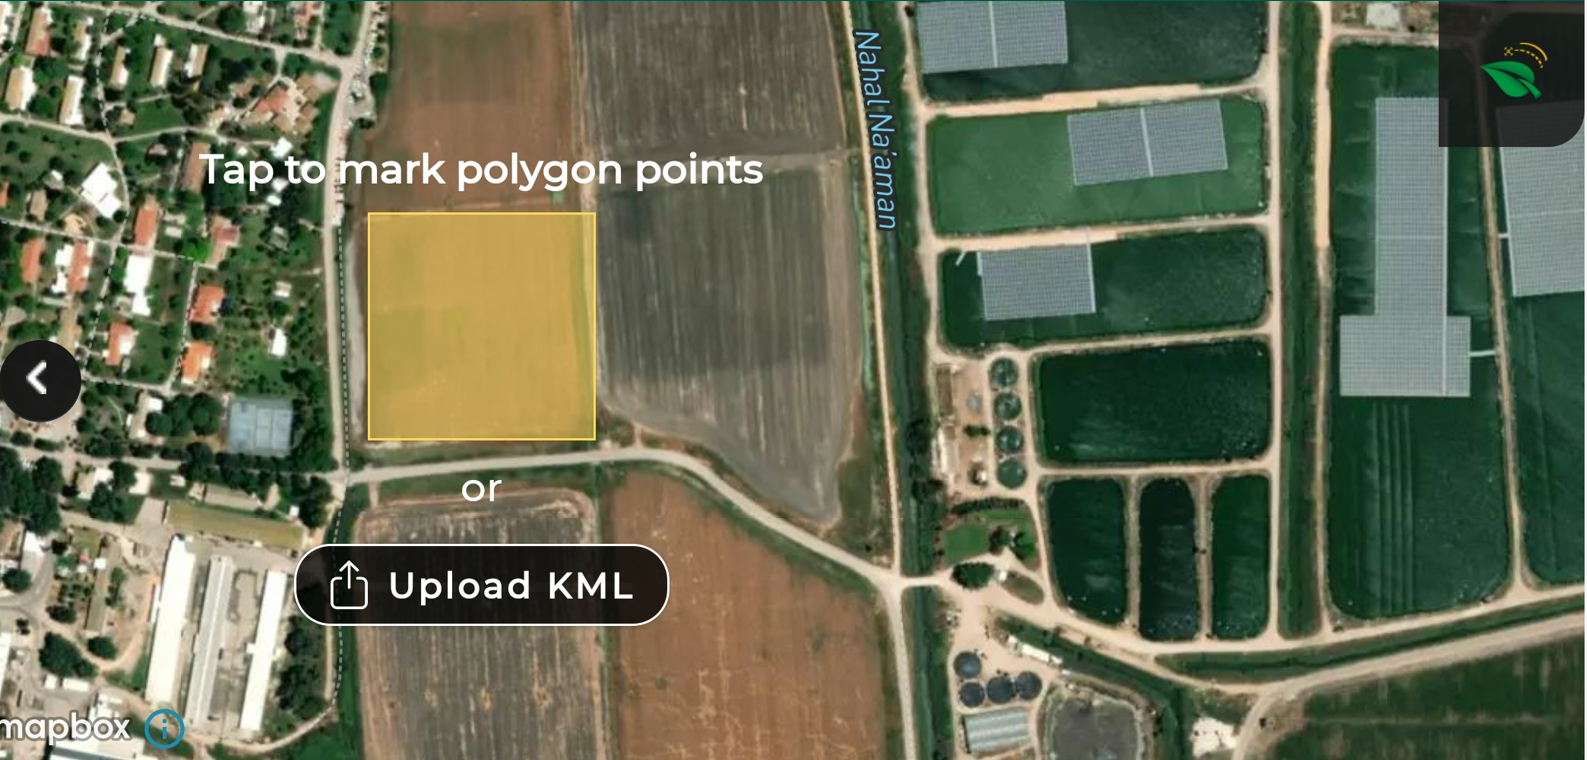
Drag the map onto and place the yellow square in the middle of your field. Then, tap the yellow square to paste it on the map.
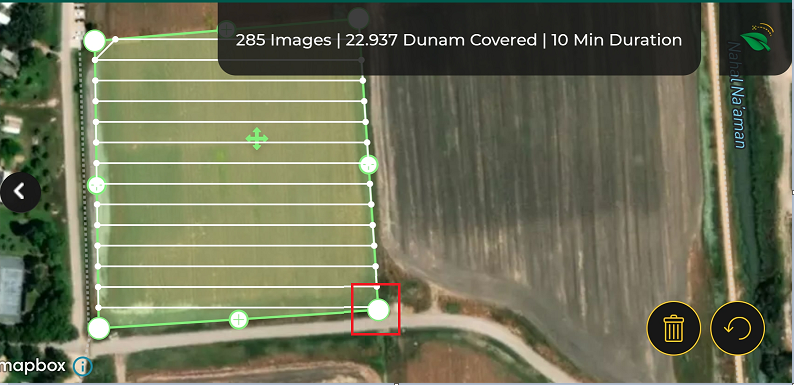
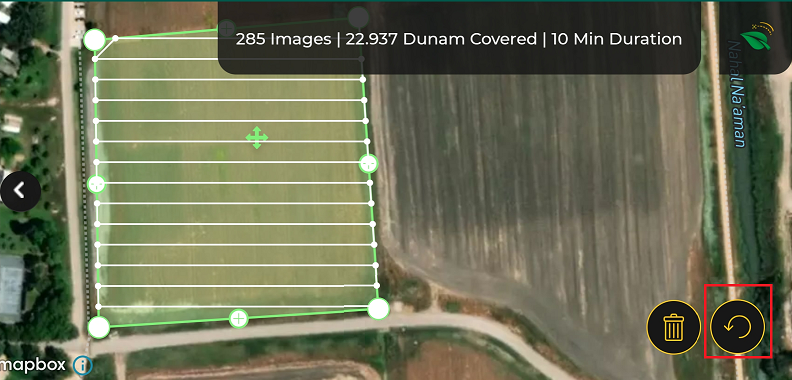
Adjust the edges of the polygon by dragging the white circles to the actual boundaries of the field.
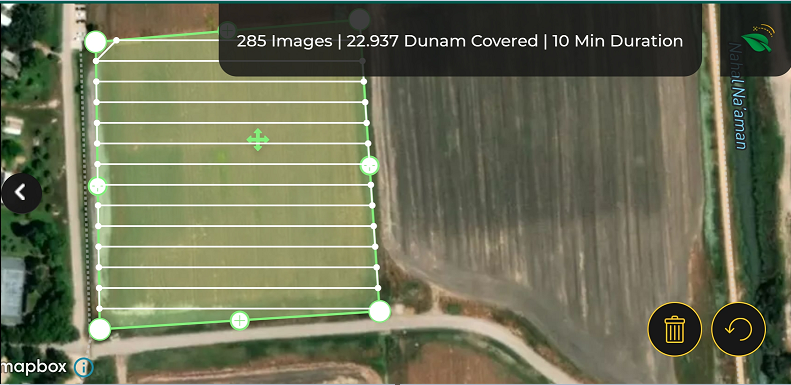
Press the reload button to go back to the previous edges.
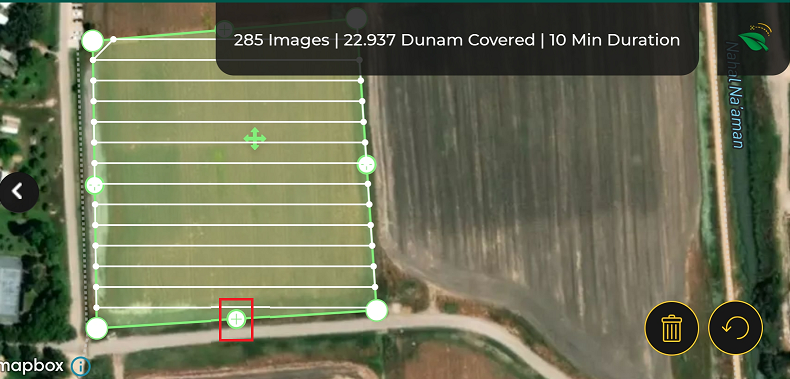
Press the "+" sign to open a new circle to draw a non-cubic structure on the field.
Press the black arrow to open the bar on the right.
The default is set to flight pattern "Auto-Optimization," however, you can change it's angle according to your needs.
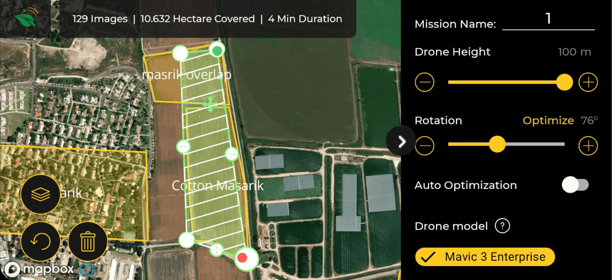
The Mavic 3 Multispectral allows the selection of RGB & NDVI data collection simultaneously. To do so, select the button RGB+NDVI.
Press the "Let's Fly!" button.

The pre-flight checklist will open. Make sure all checkboxes are marked with a green "✓. "
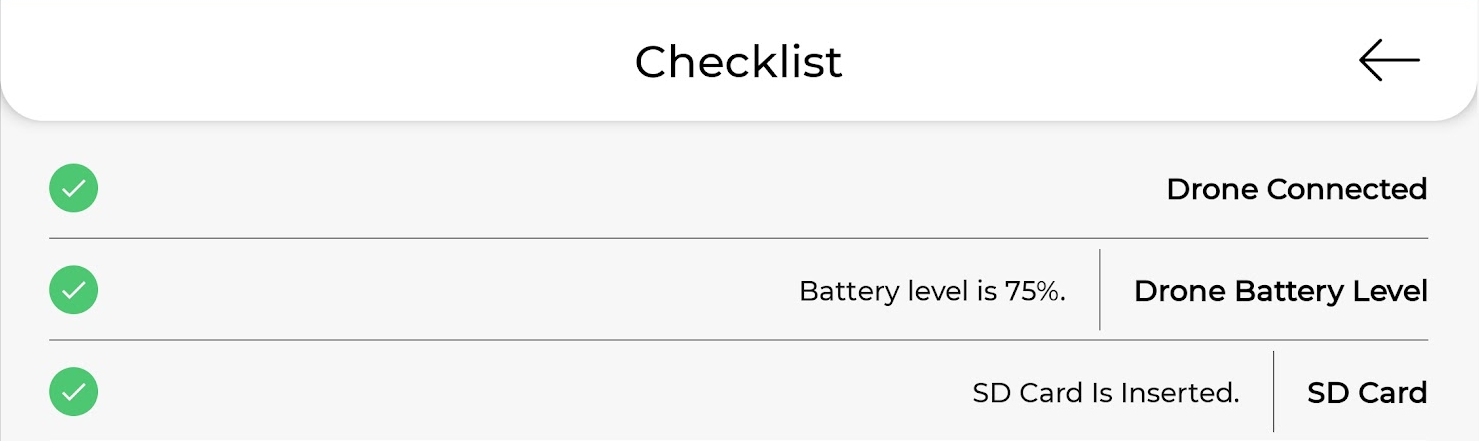
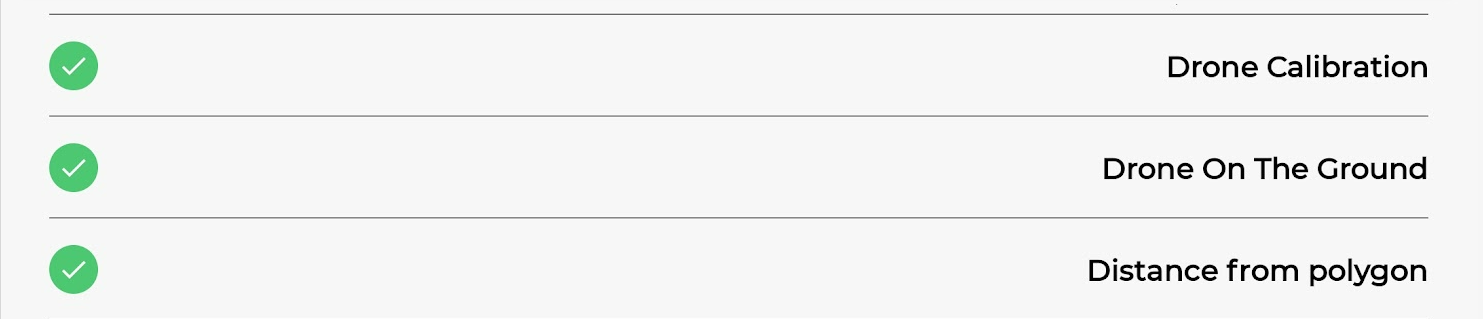

Press the "Let's Fly!" button.

How to Make an Existing Mission?
How to Make a Canopy Coverage Mission?